Hijacking and overclocking an TV box
Hello, there. I’m sorry for not updating for more than half a year. Well, I just finished my SPM. Anyway, I was free during these few months. I am planning to do some research in Machine Learning. I also want to do some projects related to it. However, Machine Learning usually is computationally expensive and requires a 24-hour server to operate.
Initially, I attempted to utilize Google Colab due to its popularity among the experts in this field. However, I decided to avoid it because of its pricing. Then, I also attempted Amazon AWS and Microsoft Azure, but they were not a good fit for my needs. Finally, I gave up on the cloud server and tried to rescue my tv box.
I installed my tv box with Armbian to use as a private server. Unfortunately, it broke down after I attempted to run TensorFlow on it during a competition a few months ago. Luckily, I can fix it by restoring the corrupted eMMC.
Installing Armbian
Building OS image
Initially, this TV box used the RockChip RK3318 processor and 4GB of RAM. Unfortunately, Armbian was not officially supported on this hardware at the time. Consequently, I had to resort to some sneaky hacks to get it to boot. Fortunately, there was an experimental Armbian image available that I was able to use. So, I downloaded the build repository and tried to compile it.
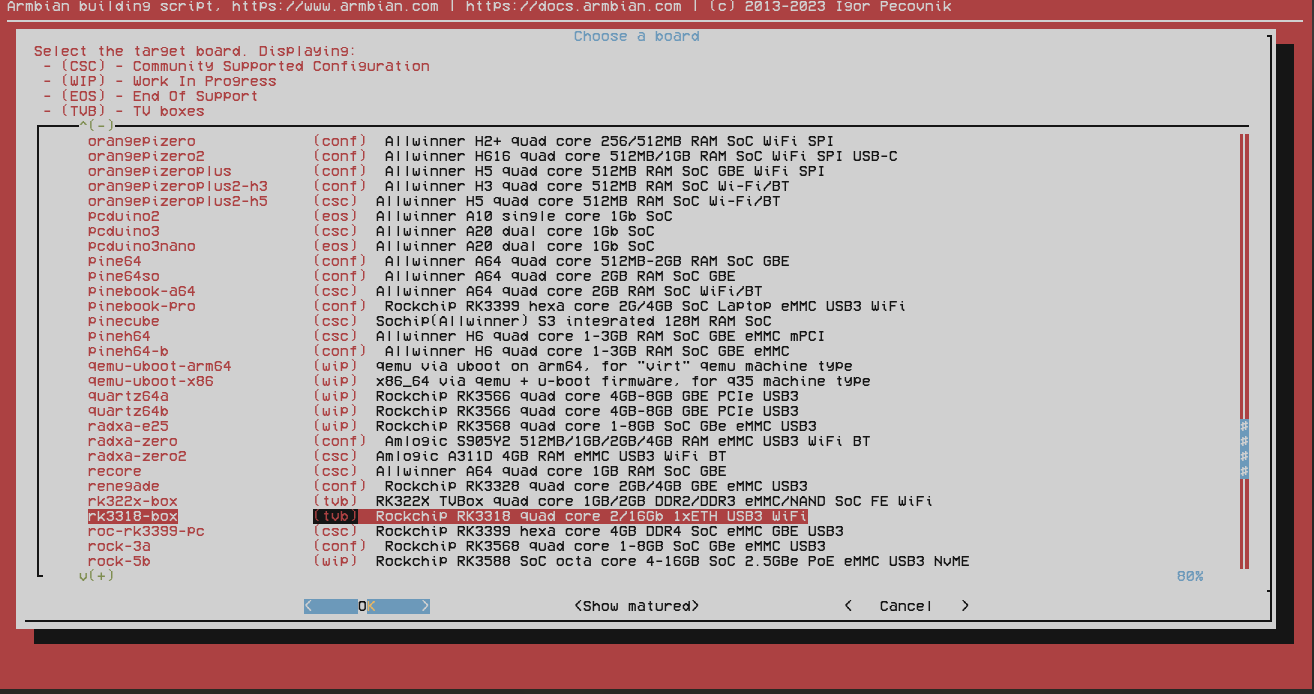
The build process is relatively straightforward. First, select the correct board config and let the automated script do the rest. Once everything has settled, I flashed the compiled Armbian image onto a 32GB class-10 SD card. Once the flashing process is done, just simply insert it into the board.
Booting

To ensure the Armbian runs correctly, I plugged its HDMI to a television instead of hooking it directly to router. After about 2 minutes of black screen and silent, something finally showed up on the monitor. At this point, I confirmed that everything works fine. I then connected it to router and allocate a static IP, 192.168.0.169. This ensured that the device had a consistent IP address and could be easily accessed on the network.
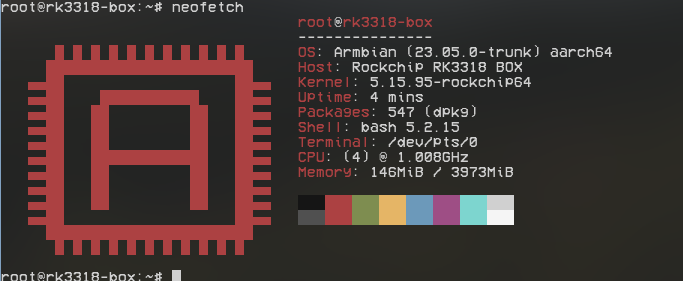
One of the convenient aspects of Armbian is that once it detects an accessible network, it automatically starts the SSH service. Hence, I can access the device via my laptop without plugging in keyboard and monitor into it. After setting root user password and other staff, I finally greeted by a neofetch screen.
However, the underclocked CPU at 1.008GHz locked clock speed is currently the main weakness of the system. My goal is running CPU intensive tasks on this board and use all of its values. For example, cryptomining.
Overclock
Benchmark
Alright, before getting into the deep overclocking rabbit hole, I would like to do some benchmark for comparison later on. After doing some quick research on Google, I choose 7zip builtin benchmark because it is primaryly targets on CPU computing performance rather than other aspect such as RAM and cache. To perform the benchmark, just use the following command:
7z -b
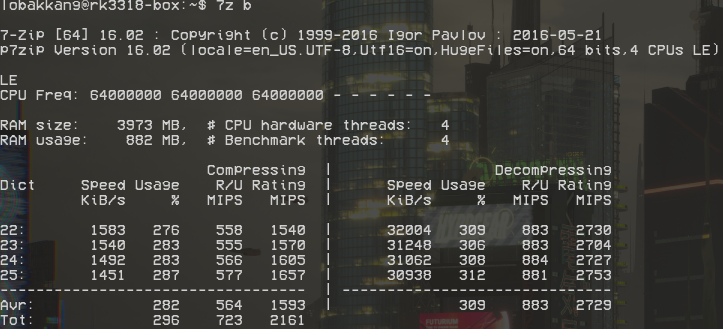
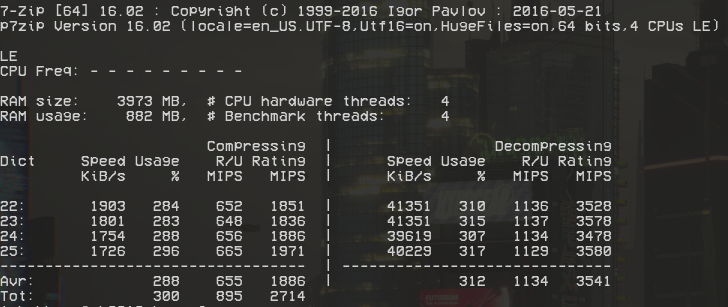
After waiting the benchmark result patiently, I was genuinely dissappointed. On average, the compressing speed was around 1.5 megabytes per second, while the decompressing speed was only 32 megabytes per second. This is painfully slow compared to my potato toaster laptop, which has a compressing speed of 16mb/s and a decompressing speed of 200mb/s. It is clear that this setup is not complete yet. I searched the CPU datasheet and found that the maximum clock speed before burnout is 1.4GHz and the highest CPU operating voltage is 1.35V. It is apparently that the board is not running at its full potential.
Finding way to overclock
To be honest, this is my first time overclocking a electronic device. Yes, not a laptop, not a desktop, but a Linux-loaded tv box. Luckily, Linux is open source and the way to crank the CPU frequency is far easier than I think. Since this device is orientated as an ARM powered embedded system, all the hardware related configuration is stored in a systel file called Device Tree Blob (DTB). Thankfully, the armbian-config utility software has option to open the DTB directly in vi.
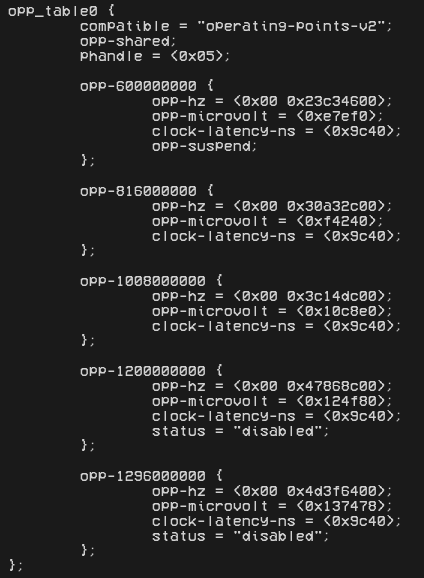
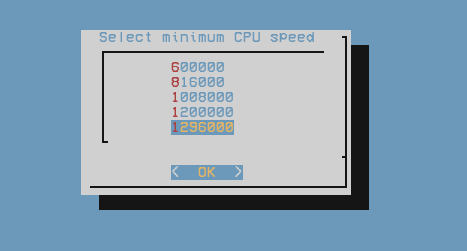
After searching across the source of DTB, I came to an OPP table or operating point table and found that there are two entry of 1.2GHz and 1.296GHz disabled at default. I removed the line of disabled and built the DTB again. After reboot, the two new frequency selection is shown.
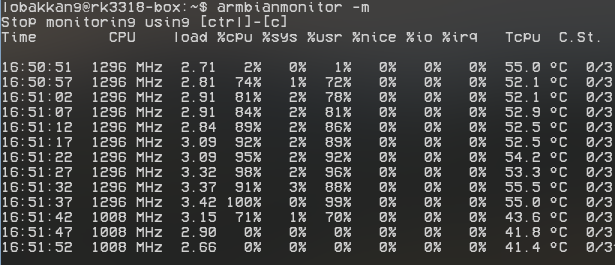
Then, I rerun the benchmark. To my surprise, the performance increases at amount of about doubled (decompressing speed). Whereas no significant increase in CPU temperature.
Push the CPU limit before disaster happen
Of course, 1.296GHz is not my final goal. The maximum frequency is 1.4GHz and I wondered that whether it is a real limit or just a “recommendation”. Then, I tried to mess with the value of opp-hz and opp-microvolt in the OPP table. After converting the hexidecimal value to decimal form. I found out that they are just the CPU clock speed in Hertz and logic voltage in microvolt.
| opp-hz | Clock speed (Hz) | opp-microvolt | Logic voltage (uV) |
|---|---|---|---|
| 0x47868C00 | 1200000000 | 0x124F80 | 1200000 |
| 0x4D3F6400 | 1296000000 | 0x137478 | 1275000 |
Alright, this blog is already quite long. Long story short, after one sleepless night, I tried almost all possible combination of frequency and logic voltage. The device undergoes three system freezes and overheated for dozen times. I realized the 1.4GHz is really a barrier. Although the cortex A53 core can theorically reach 2.04GHz but the RK3318 is somehow limit it. Hence, the system become unstable when the CPU frequency goes beyond 1.4GHz. The highest config after lot of trials and errors are 1.32GHz and 1.325V. Here’s the hex values:
| opp-hz | Clock speed (Hz) | opp-microvolt | Logic voltage (uV) |
|---|---|---|---|
| 0x4EAD9A00 | 1320000000 | 0x1437C8 | 1325000 |
Final result
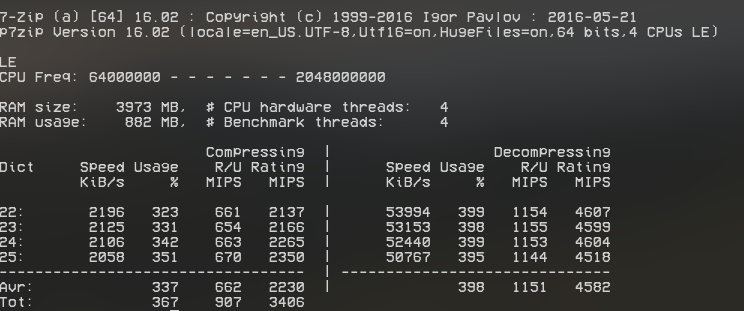
| Clock speed (GHz) | Compression speed (mb/s) | Decompressing speed (mb/s) |
|---|---|---|
| 1.008 | 1.5 | 32.0 |
| 1.296 | 1.9 | 40.0 |
| 1.320 | 2.1 | 52.0 |